Anatomy of a Hook
The most important tool in your arsenal as a crocheter is your crochet hook. When I first started, I really didn’t know much about why I liked one hook or felt clumsy with another. But there are really good reasons for this!

Hooks come in a variety of brands and styles, the two most famous being Susan Bates and Susan Boye hooks. There are some variations as well, but those are the two most common.
Let’s take a look at my favorite style first – The Susan Bates Hook.

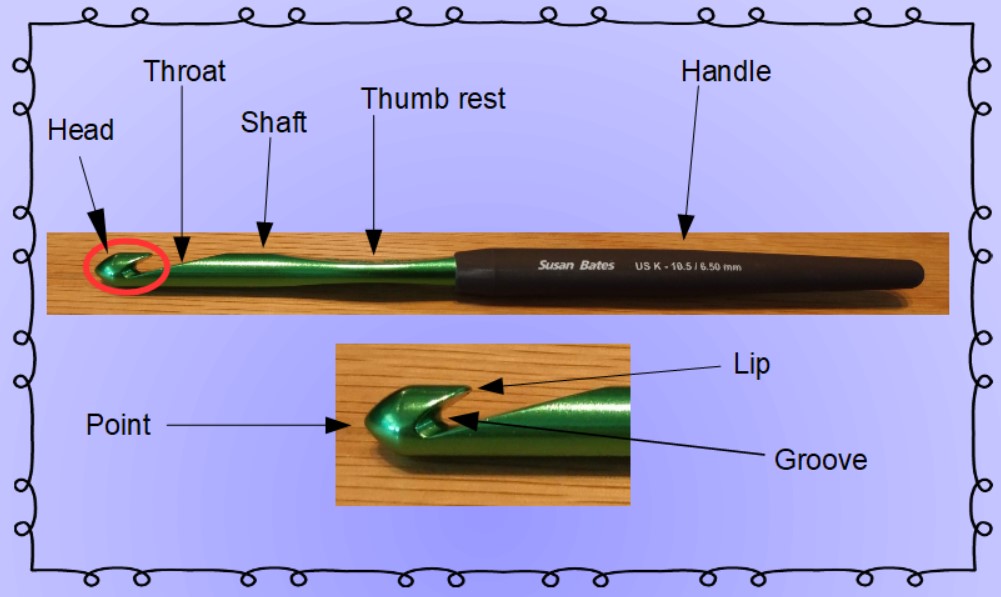
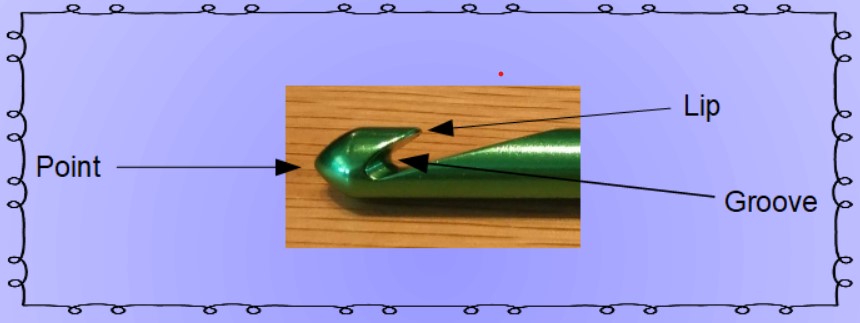
Starting on the left, I’ve circled and labeled the head of the hook. There’s a closer image below that labels the parts of the head – the lip, groove, and point. Next on the upper image are the throat, shaft, thumb rest and handle. This happens to be a cushioned hook, which is nice for those of us with wrist issues.
The handle of hooks is pretty standardized. Most are long and skinny, but with our growing awareness of wrist health, there are more and more ergonomic variations available all the time. And, most hooks have a thumb rest – that flat little spot where most of us rest our thumbs. We’ll talk about different holds and different ergonomic styles in another post, because this is really important!
Next is the shaft. There can be some variables in the shaft – some are shorter and some are longer – and this becomes important when doing tunisian crochet, or long stitches with multiple wraps. For beginners, it’s not that important though.

For most people, the head of your hook is where the important differences live. The image above shows my preferred hook (not right or wrong – my personal preference). It’s a Bates hook. If you look at the hook, you can see that the part we refer to as the point is actually kind of pointy. The groove is deep, which I find helpful to hold my yarn. And the lip is a little bit sharp and blade like, which grabs the yarn well for me.
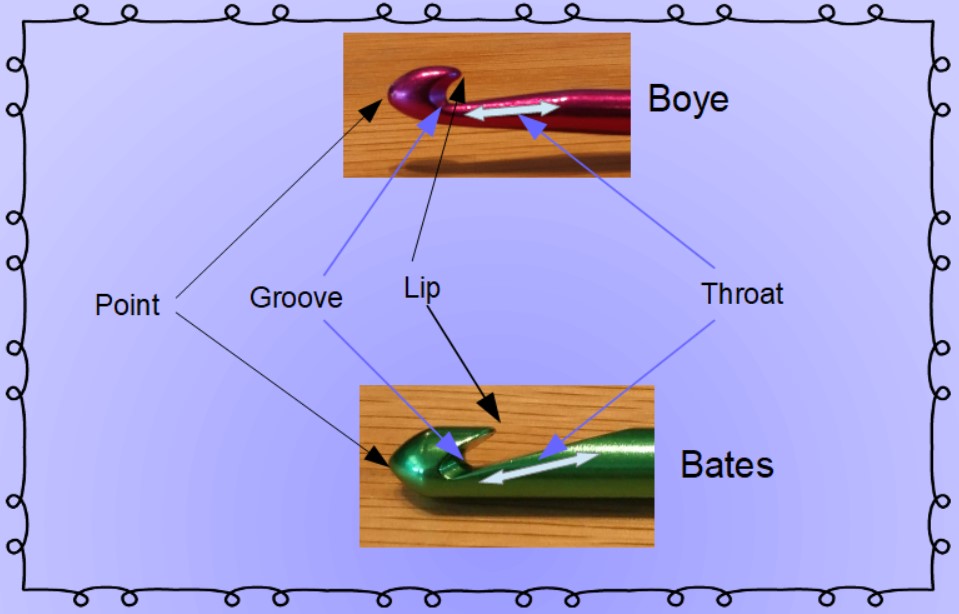
I didn’t label the throat in the close up of the head, but it’s labelled in the photo below. On a Bates hook, which is referred to as Inline, you can see that the shaft (the part after the throat) and the head are the same diameter. There is a sharp dropoff from the shaft to the throat. If the shaft and the head are the same diameter, it might be easier to keep your stitches even, as you won’t have to loosen your work just a little to pull the head through a loop.

In this image you can see a comparison of the Boye hook to the Bates hook. If you look closely, you can see that the Bates hook is slightly pointier, where the Boye hook is slightly rounder. The groove on the Bates hook is deep but the groove on the Boye hook is shallow. Some people prefer this as they feel it’s easier to release your stitch. The lip on the Boye hook is very blunt, which some people feel makes it less likely to split your yarn. You can also see that the head of the Boye hook is noticeably larger than the shaft. For most stitches, this is something people work around, but if you ever find yourself struggling making a bullion stitch, try switching to a Bates to see if it’s easier!
So that’s the two basic styles of hooks. There are definitely pros and cons to both. But I have found personally that the one I learned with is really the one I prefer. Which is the Bates hook for me. If I try a Boye, I feel clumsy and slow. It took me a while to figure out that this was the difference, but now I know how to shop for new hooks better and am less likely to buy a hook I don’t like.
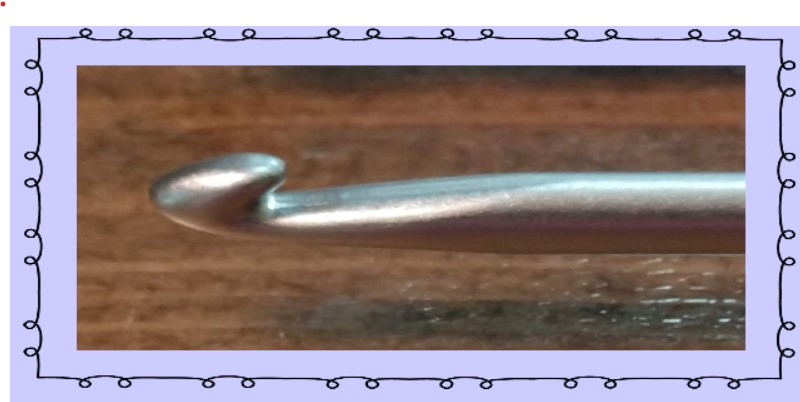
The Clover hook is kind of in the middle of these. Some people consider the Clover hook to be the best of both worlds. I’ve used them and I don’t feel as clumsy with them as I do with a Boye, so they are definitely different although they look rather similar.

So what kind of hook do you love? What do you love about them? Have you tried other styles?
Happy Hooking!
