Are you stuck in the house? Me too! Isn’t everyone? To help fill time I’ve been crocheting like mad. And shopping is a challenge so I decided to make my own Easter Baskets this year!

This pattern has been designed to be simple enough that you can substitute whatever yarn you have. Seriously! Anything will work! Have fun with colors and textures, although if you use more than one type of yarn, try to stay as close in weight as you can. A little difference here or there won’t make much difference, but don’t use a bulky yarn with a sport yarn. Unless you are okay with really working those stitches!

Isn’t that cute? It’s the perfect Easter size too! It has 2 dozen plastic eggs in it in that photo. But can be filled however you want.

So let’s get to it. Here’s what you need:

Suggested Yarn: Lily Sugar ‘n Cream
Yarn Weight: Worsted
Shown in colorway: Playtime Ombre and Yellow
Yardage: less than 100 yards
Recommended Hook: 5.00 mm, US – H/8
Dimensions: Basket 5 inches high by 11 inches across, Handle 12 inches at peak

Terms and Abbreviations Used (US terms)
(all stitch abbreviations capitalized for easy identification)
CH = Chain
SC = Single Crochet
CH sp = Chain Space
sh = Shell
DC = Double Crochet
SK = Skip
gr = Group
SLST
MR = Magic Ring
sp = Space

Pattern Notes

  • I do not start my rows with a chain 3 as many patterns do. I instead use a stacked double crochet, as explained on this page. Instead of the first DC you may use a standing DC or a chain 3 as you prefer.
  • This is a highly adjustable pattern. I used Sugar ‘n Cream cotton but you can use any yarn you want to adjust the size. A bulkier yarn will make a larger basket. You may also increase the number of double rows to make the basket deeper without affecting the pattern.

Pattern Instructions

For Basket

Row Details Stitch Count

Make a magic ring
1 Place 10 DC in the MR, join to the first DC with a SLST. 10 DC
2 2 DC in each stitch around, join to the first DC with a SLST. 20 DC
3 (1 DC in the first stitch, 2 DC in the next) x 10, join to the first DC with a SLST. 30 DC
4 (1 DC in the next two stitches, 2 DC in the next stitch) x 10, join to the first DC with a SLST. 40 DC
5 (1 DC in the next three stitches, 2 DC in the next stitch) x 10, join to the first DC with a SLST. 50 DC
6 (1 DC in the next four stitches, 2 DC in the next stitch) x 10, join to the first DC with a SLST. 60 DC
7 (1 DC in the next five stitches, 2 DC in the next stitch) x 10, join to the first DC with a SLST. 70 DC
8 DC in each stitch around, join to the first DC with a SLST. 70 DC
9 DC in each stitch around, join to the first DC with a SLST. 70 DC
10 DC in each stitch around, join to the first DC with a SLST. 70 DC
11 DC in first stitch, 2 DC in same stitch, (CH 4, SK 6, 5 DC in next stitch) x 9, CH 4, SK 6, 2 DC in same space as first 3 stitches, join to the first DC with a SLST. 10 CH 4 sp 10 5 DC gr
12 SC in first stitch, sk 2 DC (3 DC in next space, CH 3, 3 DC in same space, sk 5 DC) x 10, in last repeat only sk 2 DC, join to the first SC with a SLST. 1 SC 20 3 DC gr 10 CH 3 sp
13 SLST in each of the first 3 stitches and into the CH 3 sp, 3 DC in first CH 3 sp, (CH 4, SK 6, 5 DC in next CH 3 sp) x 9, CH 4, SK 6, 2 DC in same space as first 3 stitches, join to the first DC with a SLST. 10 CH 4 sp 10 5 DC gr
14 SC in first stitch, sk 2 DC [(3 DC in next space, CH 3, 3 DC in same space, sk 5 DC) x 2, (9 DC in next space, sk 5 DC) x 3] in last repeat only sk 2 DC, join to the first SC with a SLST. Fasten off. 1 SC 20 3 DC gr 10 CH 3 sp

For Handle:

1 With outside of basket facing you, locate one of the two pairs of edge stitches with chain 3 spaces in them. In the space on the right, place 3 DC, and 3 DC in the adjacent space, turn. 6 DC
2 DC in each stitch across. 6 DC
3-11 Rep R2 6 DC
12 Rep R2, fasten off leaving tail long enough to join to other side of handle. 6 DC

Turn basket around and repeat handle instructions on the other side.

Sew 2 handles together with a whip stitch, and sew in all ends

After all your ends are sewn in and the handle sewed together, find a bowl that your basket will fit around. You should choose something that will stretch the basket and is tall enough to lay the top edge flat against the bowl for the prettiest finish. Next, dip the basket in a mixture of 4 parts water to 1 part Elmer’s glue. Do not soak, as this will cause the colors to bleed. Once dipped, fit the basket around your bowl, press your edges flat against the bowl, and prop the handle up. I used a tall cleaning wipe container with a bag of coffee beans on top. Whatever will hold the handle taut and upright. Leave the bag to dry until it stiffens. This took a little over two days for me, but could be sped up with a hair dryer.

It’s here! I’m so excited to release this pattern to you! I have worked very hard for the last week getting everything ready to go in time for Christmas and it looks like it’s going to work out after all!

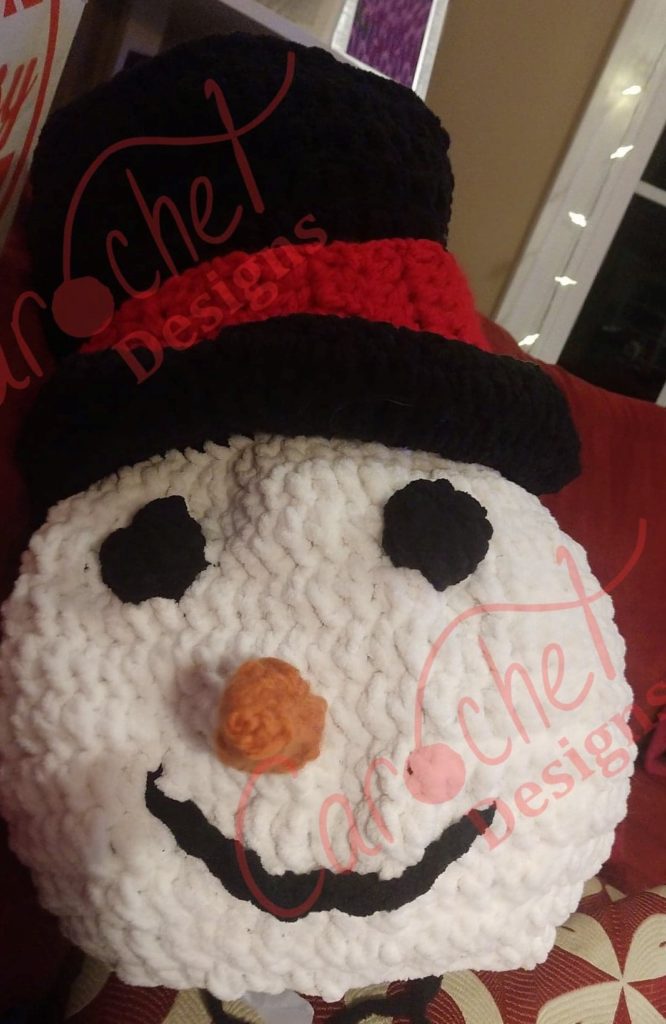
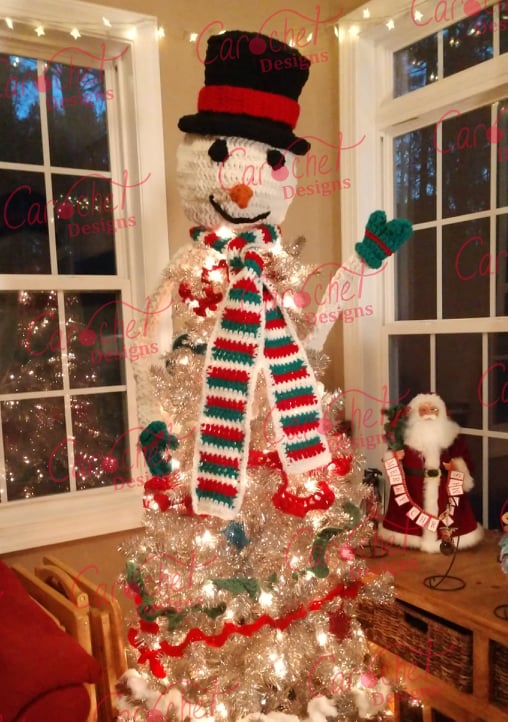
Isn’t he adorable? I had so much fun making him! I released my garland pattern a couple of weeks ago and realized that my tree needed a topper of some sort. I started researching and really didn’t like anything I saw that was manufactured. And this tree is in my Yarn Vault, and is destined for handmade ornaments, so why not make something for it?

The something had to be really special though. A star is beautiful, but I like big, creative things, so it seemed too minimal. I wanted a LOT OF PERSONALITY!

Thus Mr. Snowman was born. He has a lot of character and really brightens the room with his cheerful smile and welcoming wave, don’t you think?

This pattern was thrown together very quickly and I didn’t have time to test it. Because of that, I’m offering a ONE HUNDRED PERCENT Discount for the first 100 purchases in the first 48 hours.

In addition, if you are the first one to find a mistake that requires correction, I will offer you one free future pattern! I have 15 patterns waiting to be released over the next few months so there will be plenty to choose from!

Click here for the coupon code!

There are some pictures included in the pattern which will be updated as I make a second version.

I hope you love him as much as I do!

Happy Hooking!

I have a super cute pattern coming out, hopefully tomorrow. He’s almost ready to go live. But, I can’t wait to share! Here’s a sneak preview. You’re never going to guess what he is!

Christmas Tree Spiral Garland

Deck your tree with festive garland! Quick and easy to make, this garland can be made in various lengths and thicknesses to create exactly the look you want! This is more a technique than a hard fast pattern but I’ve included some suggested yarns and stitch counts to get you started.

Terms and Abbreviations Used (US terms)

CH = Chain
STDC = Stacked Double Crochet (see pattern notes for description)
SC = Single Crochet
CH-SP = Chain Space
DC = Double Crochet

Yarns Used in Photo

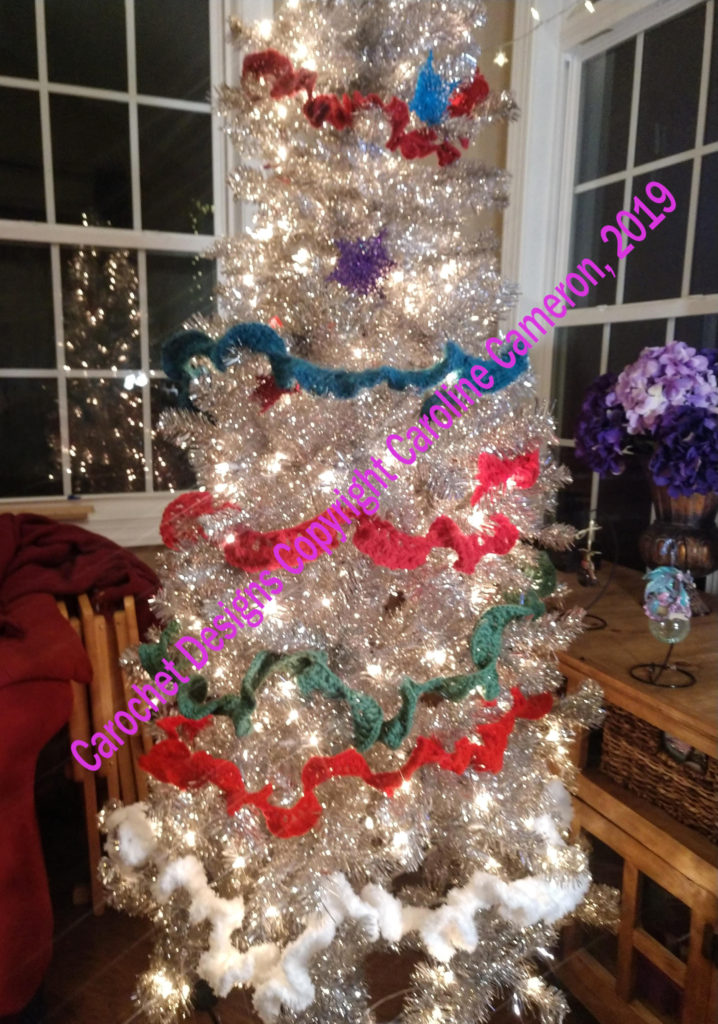
Bernat Piqsueak in Whitey White is the bottom row. It is a bulky yarn, and used 100 stitches to achieve 60 inches in width with an L hook

My three reds are Stylecraft Special 4 ply in Lipstick at the bottom, this was 100 stitches of worsted weight, and is about 55 inches in width with an H hook

Bernat Blanket in Race Car Red in the middle, bulky yarn, 75 stitches, 60 inches in width with an L hook

The top red is Loops & Threads Woolike in Red, this is a fingering weight yarn and took 150 stitches to be about 35 inches in width with an E hook

The greens are Scheepjes Chunky Monkey in Pickle – 100 stitches is 45 inches wide with a G hook

The upper green is actually a teal but it looks great on the tree! It’s Red Heart Hygge in Teal, 75 stitches is 40 inches with an I hook

Pattern Notes

  • For starting stitches, I recommend a Stacked Double Crochet. I find this leaves no gap in my work, as a chain 3 might, and is less noticeable than a standing double crochet. This also alleviates the need to make a chain stitch at the beginning of a row, leaving a nice smooth edge when you are finished. To make a STDC: place 1 SC in first stitch. Slip your hook between the two legs of this SC coming out the left side and pull up a loop (just the same as with any stitch but on the side of the stitch instead of the top), pull through both loops on your hook. You have now stacked two single crochets on top of each other, making a double crochet. You can repeat this as many times as needed to achieve the height. Three stacked single crochets = treble crochet, etc.
  • This garland is infinitely adjustable. For wider garland, use larger gauge yarn or repeat Row 2 until desired width. For longer lengths, just increase the number of chains. The sky is the limit!
  • I find it easier to work with garland in varying lengths. Get a rough estimate of the width across the bottom of your tree, and start from there. For my 6.5 foot tinsel tree, I needed 60 inches to drape the bottom properly. I started with a bulky weight yarn, chained 150 stitches. With a worsted weight, I would have used 200 stitches. But, the beauty of this pattern is that there is no need to count. You can chain until you achieve the desired length, and add a little extra for drape.
  • My highest red garland in the photo is made with a fingering weight yarn. It is more delicate than the other strands, and so I repeated Row 3 an extra time. I like the delicate look it achieved!

Pattern Instructions

  1. CH desired number of stitches for width of tree, adding a little for drape
  2. Working in back hump of chain, make a stacked DC in 2nd hump, CH 1. DC, CH 1 in every hump across, turn
  3. STDC in first stitch, CH 1. (DC, CH1) x 2 in next CH-SP. Repeat in every CH-SP across, DC in final stitch, turn. Fasten off. If you need to add width, (using finer yarn, or just want wider garland) do not fasten off, repeat this row until desired width is achieved.

It is that time of year again. Thanksgiving is Thursday and everyone is busy decking the halls and gearing up for Christmas. We have a shorter than usual holiday season this year, with Thanksgiving falling on the 28th, the latest day it can fall.

So I have the perfect, super fast, STASHBUSTER project for you! It requires virtually NO counting, and is so simple you can do it without even looking at your pattern. In the past two days I’ve covered my 6.5 foot tinsel tree in garland and have the foundation for an adorable crafty Christmas tree.

Best of all, I’ve done it with leftover yarn from other projects. So no money spent! Woohoo! I love how it’s different textures, colors, shades of red, green, and white. I’m still making some snowflakes to decorate, but in the meantime, it’s festive and cheery.

The secret is in the lengths. You do not want one gigantic piece of garland to wrap around your tree. First, that’s really time consuming to make, it gets all tangled as you’re trying to decorate your tree, and even more so when you take it down and store it. So make life easier, and makeseveral different lengths based on the size of your tree. I just eyeballed it, but if you want to measure, start at the bottom and make the biggest piece first. The rest will be so much easier!

I’ve used Bernat Piqsueak in Whitey White for the white, which is a furry, snow like look. My three reds are Stylecraft Special 4 ply in Lipstick at the bottom, Bernat Blanket in Race Car Red in the middle, and at the top is Loops & Threads Woolike in Red. The greens are Scheepjes Chunky Monkey in Pickle and the upper one is actually a teal but it looks great on the tree! It’s Red Heart Hygge in Teal. Like I said, I dug around in my stash and this is what I’ve come up with. I’m considering adding a few more lengths and making a rainbow!

Click HERE for the next page with all the pattern information!