Do you ever have pain when you crochet? I do, and I’ve tried a bunch of different things to figure out how I could keep up my creative outlet and still be pain free. I was a hairdresser (in cheap heels!) in my 20s which really wreaked havoc on my now 50 year old body. So I have to be extra sensitive to my wrist health. I never had surgery but have a few tips to keep your wrists in peak form.

First, consider your hook. When my old pain started flaring back up, I got the fastest solution I could find. The Crochet Dude Ergonomic Crochet Handle It’s not a perfect solution, but it’s available at most big box craft stores, so you can get your hands on one easily. It fits most aluminum crochet hooks, whether you’re a Bates or a Boye loyalist, so that’s extra handy.

Which brings me to the next consideration. How do you hold your hook? I prefer a knife hold personally, and my pinkie is what grips the hook in pace against my palm. The egg works great for knife holders like me, and I’ve read that pencil grippers also like it. Try it out if you’re in an urgent need.

The downside of the egg handle is that it requires extra parts and I’m prone to losing things. Because it’s designed to be univeral, and crochet hooks are not all the same diameter, it requires a rubber stopper to be placed around the hook and then through the inside (which screws apart) to secure it in place. Great concept, but if you lose a stopper, you’ll need to improvise or your hook will rattle around and the egg won’t hold it tight enough.

You can also buy foam grips which slip over your hook. They come in multiple sizes and are typically inexpensive enough that you could probably purchase a few and leave them on your hooks permanently. This is a good solution if the grip is the right diameter for you. I, personally, need a larger grip to open my hand up and prevent cramping.

Which is how I started searching for alternative ergonomic hooks. I started with inexpensive sets from Amazon like this one. They’re cheap enough that I keep a set in my car for emergencies, but they had a few problems. First, I’m a Bates Hooker, and these are more Boye like. It’s exceedingly hard to find an ergonomic handle with a Bates hook. And secondly, the diameter is just not big enough for my grip.Paragraph

My search continued until I found these beautiful wooden hooks from Too Shay Crochet. I started with a 7 hook set and I’ve ultimately replaced every hook in my everyday collection with them. I’ve even sent them my favorite steels and they placed handles on them for me.

Once I figured that out, my wrist pain has virtually disappeared. I do have to pay attention to my posture and make sure I’m seated comfortably and my work is well supported.

It was touch and go there for a while though! I was afraid I would have to give up my beloved hobby. But, I persisted and found a solution that works for me. If you encounter pain, just know that there are a number of options before you have to give up. Try a few things out and I bet you’ll find the solution!

Anyone who’s crocheted for any amount of time thinks that the WORST part of projects is sewing in ends. Okay it’s me. I’m anyone. And I hate sewing in ends.

I’ve experimented with a variety of methods and spoken to many crocheters about it and I’ve decided the absolutely MOST IMPORTANT TIP is to leave your ends long enough. Like about 12 inches. Unless you’re playing yarn chicken, and then you do what you have to do.

If your end is long enough, you have room to sew in ends right. You won’t use all this length, but you’ll use maybe half of it. If your end is too short, that last little pass through will be extremely hard and you might have to resort to some special tricks to make it work.

First, start with the best needle. I like stainless steel best. Aluminum gives me the heeby jeebies. It squeaks and sounds like fingernails on a chalkboard to me. So don’t fall for the pretty colored needles. Unless you like that sort of thing. 😉

These are my favorite needles. Clover Bent Tip Tapestry Needles The little bent end makes it super easy to get in the tiny spaces between your stitches. And since they’re stainless steel, they’re also magnetic, so they stick to the magnets on my work easel. Major bonus points on that one.

Next, once you have your yarn threaded, you weave your ends into the bottom of your stitches for at least 10 stitches, making sure you poke in between the plies on your last stitch. Next, turn around and go back through the same stitiches, but be certain you don’t go back through that first yarn split. Again, with the last stitch, you want to go between the plies on the final stitch. You may do this a third time depending on the project. I usually do, because I want that extra length available in case something goes wrong after the project is done, but it should be secure enough with just two passes if you have a delicate project and you don’t want the bulk to show through.

That’s it! Snip the yarn as close to the end as you can, and I normally rough up the edges just a bit to hopefully tangle them together and add a measure of security. This is particularly effective with wool and other knotty yarns.

Happy Hooking!

Counting counting counting, blah! It’s one of the most dreaded tasks second only to sewing in ends. But, it’s almost the most important. Even the most seasoned crochet professional needs to count. One stitch off can throw everything into chaos and your finished project will be crooked.

I have a couple tricks I use to keep track on really long stretches. This is where stitch markers come in handy. There are a number of different styles, but I definitely have a preference. And note, stitch markers for crochet work can be different than stitch markers that knitters use. We crocheters want our stitch markers to mark our actual stitch, so they need to be removable. Knitters sometimes use markers on their actual needles so they don’t go around the yarn and slide back and forth on the needle. Make sure you buy stitch markers and not stitch RING markers.

Since our markers go on and off our stitches, they have an opening somewhere. Some people like the kind that slip on an off with one hand. Like these:

Those are split rings, so they’re open on one side. Super handy to put on when you have one hand available, but as easy as they slip on, they slip off that easily too. So, not favorite for a project I’m putting in and out of a bag. Maybe okay for at home use though?

So my favorite markers are locking stitch markers. And for me personally, the more the better! These babies have a way of disappearing on me. They’re small and when you’re working quickly, sometimes they don’t get put back in the case so they slip to the bottom of the bag, and you know the rest. I also have a tendency to pull out a bunch when I’m getting ready to crochet a long chain so I can access them quickly. And a few inevitably fall off the arm of the chair I’m sitting on, or off my lap, etc, etc. So buy a BUNCH! I like these myself:

I’ve also tried these, but they are not as easy to slip on and off, so I prefer the safety pin style. The little point on the safety pin makes it easier to put your marker precisely where you want it.

Once you have your stitch markers in hand, they are super handy when it comes to counting. Let’s say I’m starting an afghan and it has 212 starting stitches. Keeping track of 212 stitches can be a nightmare, even if you’re all alone in a room with zero distractions. So, I start placing a marker every 50 stitches. Now this number can change the more distractions I have. If I’m watching a tv show with my family, it goes down to 25, but if I’m chatting with my girlfriends at a coffee shop, that can go all the way down to 10 stitches! So I chain my 10 stitches, count, add a marker and keep going. Once I’ve placed that marker, I trust that the number of stitches before it is correct and then I only have to count my markers. This way I’m never at stitch 195 and have to start all over again. Saves me a lot of frustration!

For basic patterns I frequently keep a marker in place every 25-50 stitches, moving them up in my work either as I go or every couple of rows. But, if I move them, I ALWAYS count to make sure they’re still in place. Ever had an afghan that looks perfectly fine, but when you fold it in half you notice the edges are not the same length? We don’t want that to happen so count, count, count!

I do find that the less complicated the pattern, the more frequently I have to use markers. 100 stitches of double crochet is much harder to keep track of than 20 shells of five double crochets, even though they are the same number of stitches. So don’t be stingy with your counting and using markers just because the pattern is easy!

Happy Hooking everyone!

When deciding whether to block or not, the fiber of the finished project is key in deciding your methods.

The doilies I showed in my previous post are 100% cotton. Cotton blocks well, especially in a lacy pattern. In most circumstances, you would soak in plain water. But, if you have a variety of bright colors in one project, you might want to consider adding some vinegar and/or salt to your soaking solution to help set the dyes and prevent colors from bleeding. Nothing is more heartbreaking than soaking a finished project and seeing your red thread has turned all the white threads an irregular shade of pink. I use about a half cup of vinegar and a couple teaspoons of salt in my bathroom sink full of cool water.

The downside of blocking cotton is that you will need to do it every time you wash your project. Cotton will revert back to its original shape when wet, so in order to open those stitches back up, they need to be stretched out again.

But, what about wool? Wool behaves very uniquely when soaked and blocked. It has memory, so the placement of stitches during your blocking locks them in place during the blocking process, and depending on the fiber, will withstand machine or hand washing and retain that shape. Pretty cool! Follow the fiber instructions before washing though, as not all wool can be machine washed.

Wool feels and performs better after washing if you soak in a lanolin no rinse washing solution. I like Eucalan. And as someone sensitive to scents, I prefer unscented Eucalan. Like this one.

I add one capful of Eucalan to my sink of cool water. I normally let it soak for at least 30 minutes, but sometimes I get distracted and left something soaking as long as overnight with no adverse effects.

Acrylic, or other synthetic fibers don’t necessarily *require* blocking, but in my opinion, everything looks better after blocking. I would treat any synthetic fiber much the same as I would cotton. Check for color fastness and add vinegar and salt if needed.

After I remove anything from soaking, whether it’s cotton, wool, or a synthetic, I use the same method. I have two thick beach towels reserved just for this. Make sure they’re clean and dry. You don’t want to contaminate your project with anything unplanned!

Remove your project from the soaking liquid and gently squeeze out as much of the liquid as you can without wringing. If it’s something small, I normally squish it against the side of the sink until I can lift it without it dripping too much.

I then lay it out flat on my already spread out beach towel. If it’s bigger than your beach towel, go ahead and use the second towel. Or more if you need them! Then, I fold the towel over if I can, or lay a fresh towel on top. When the top and bottom are covered by dry towels I gently roll up the towels, keeping my project flat inside, kind of like a cinnamon roll. Once your have your towel cinnamon roll, you can press down on the towels as hard as you can. The project is well protected inside your roll so just go to town! Don’t wring though, because that places undue pressure on your stitches. The more water you can remove at this stage, the less time the next step will take.

Once you’re confident you’ve done your work, you can unroll your project and set to pinning it on your blocking surface. If you have blocking boards, that’s my preference, but I also will block directly on a mattress (over a sheet).

Depending on the size and fiber of a project, drying can take just a few hours, to a few days sometimes! I have a ceiling fan in the room that I use for blocking, so I turn it on high and shut the door to keep my kitties away. (And lock it to keep out my naughty Percy who’s long enough to open my doors!)

You can check periodically and see how the drying is coming along. I encourage you to not unpin the whole thing until you are 100% sure that is completely dry. Pinning for blocking is even more tedious than sewing in ends, in my opinion, and you don’t want to do it more than once!

Once it’s dry, you’re ready to go! Admire your work, you deserve it!

Have you ever blocked anything? Some things are fine right when they come off the hook, and so you may be tempted to not block them. Especially big, bulky things like large blankets. But, blocking is really a game changer when it comes to a project looking really finished.

With doilies, it’s a no brainer. Doilies are usually made with very fine cotton thread in a lacy pattern that really shines when it’s blocked and opens up.

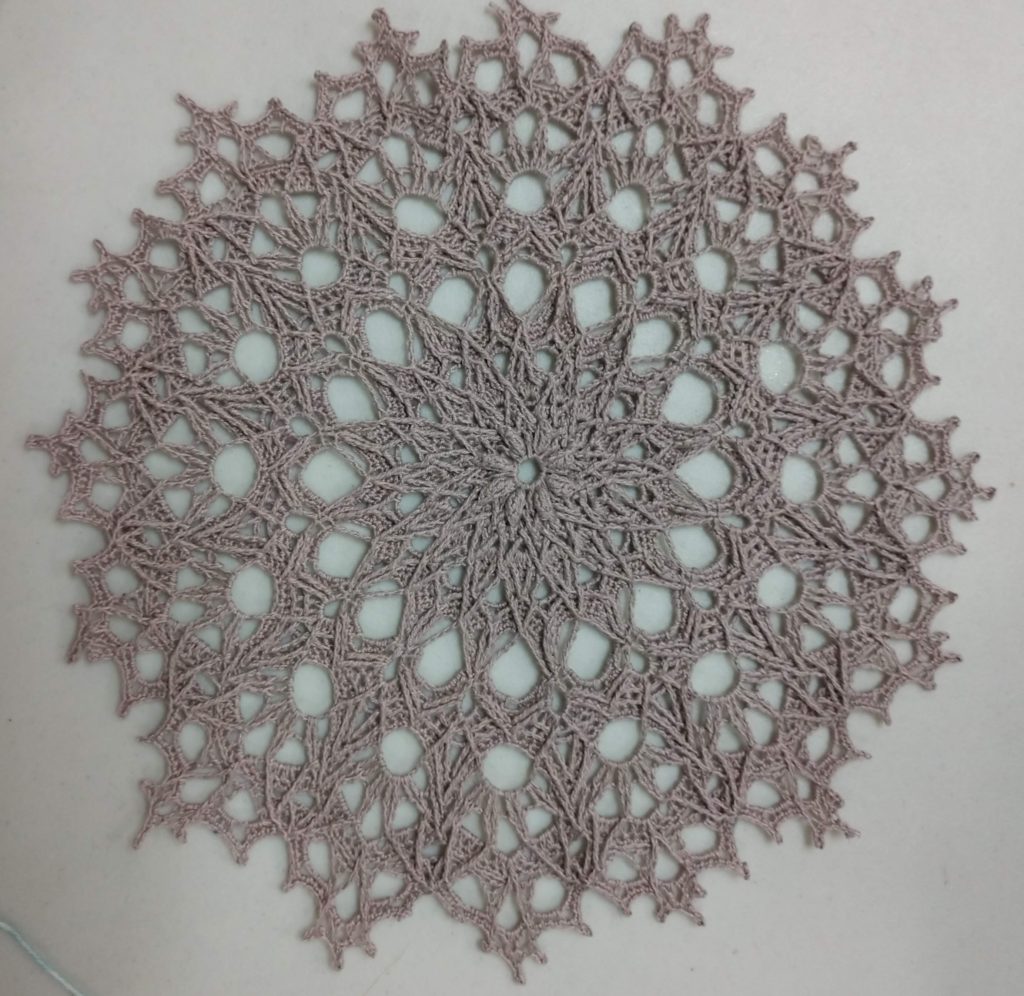
Take for example, this doily I made using Grace Fearon’s design Whitney

Whitney by Grace Fearon

It’s beautiful, isn’t it? Very lacy and lots of delicate little picots around the edges. Let me tell you, it was a nightmare to block. But, so very worth it for this finished product!

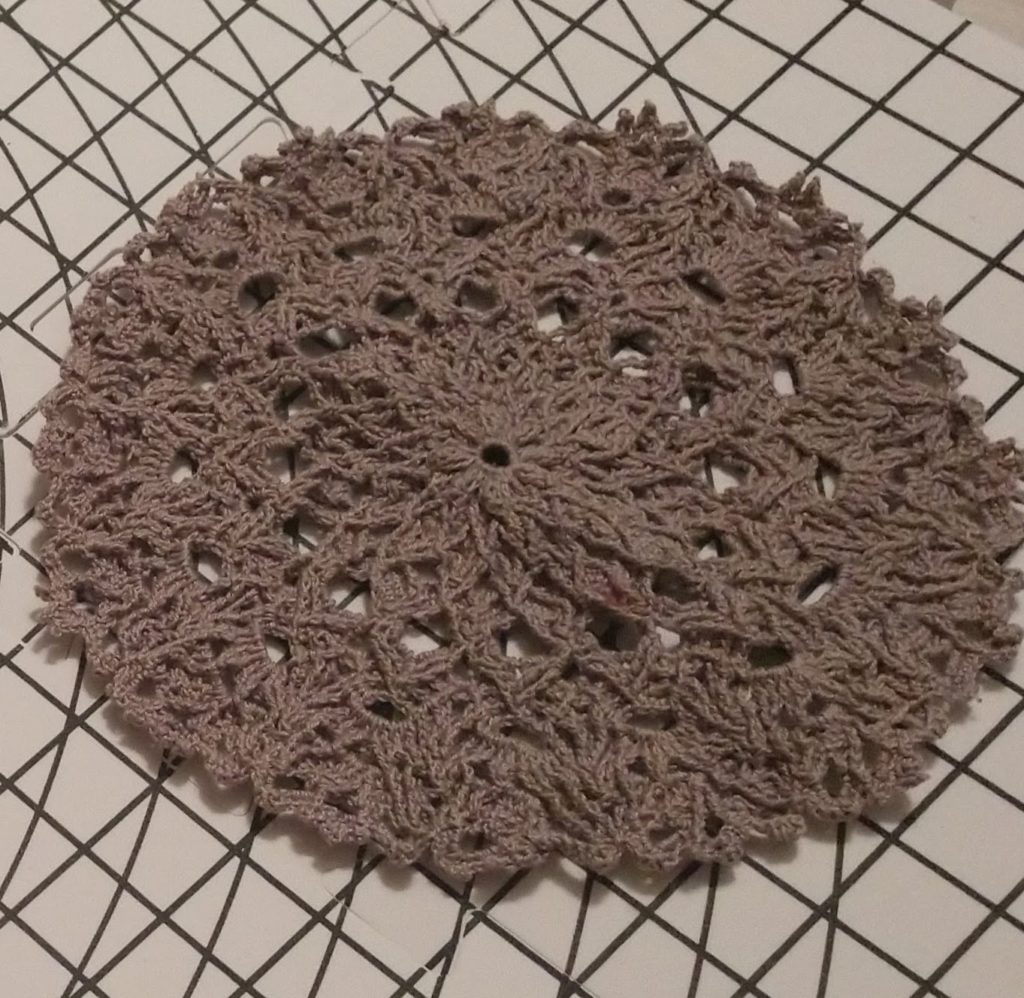
This next photo is Whitney before blocking.

Whitney by Grace Fearon, before blocking.

Hardly looks like the same doily, does it? It’s kind of thick, and while you see there are detailed post stitches throughout, it doesn’t really wow me.

Just to really appreciate the difference, here’s a side by side.

Whitney by Grace Fearon, unblocked and blocked

So, how do you achieve those results?

For something like a doily, a wet block works best. Some people like to soak in a corn starch and water mixture, or use liquid fabric starch. I don’t like stiff doilies, so I stick to just water.

Next, I set up my blocking boards. If you have interlocking foam mats, those work great! I bought this set and I love them. If you’re making doilies, they have concentric circles to help you line up your outer edges and know they’re symmetrical. As you can see, I didn’t use those for this project because I was blocking several things at once and I needed all the space.

This set happens to come with 100 t-pins which are what you use to hold your project in place. This is a perfect set for getting started. I store mine behind a dresser in my guest room. When I need it, I pull it out, spread it on the bed and get to work.

It is not mandatory to use blocking boards when blocking things. The main benefit is that it has a grid to help you line things up straight, and gives you the opportunity to lift your projects (very carefully) off the surface you’re using to support them so you can use that surface. My guest room has a frequent visitor, my dear mother in law, so if she’s visiting, she sleeps there at night and I move the boards somewhere else overnight.

If you are fortunate enough, as I am, to have a bed that isn’t always in use, you can just block directly on the mattress. My guest room has a ceiling fan, which I find particularly helpful to speed up the drying process. And a nice door I can close to keep the kitties away. Of course, my one kitty, Percy, likes to stretch up and open that door so I have to lock it to keep him out. But, it’s securable.

Now, if you are blocking something with long straight edges, like a shawl, afghan, sweater, table runner, etc, you might benefit from a set of blocking wires.

These are not necessary, precisely, but if you have long straight edges, they will make your life a whole lot easier. If you don’t have blocking wires, you will definitely need more pins. A LOT more pins

I like these:

T-Pins are really important and it’s essential they’re made of a high quality steel and are rust proof. I’ve had this set for years and they have served me well.

Okay, now that you have all the supplies, what next?

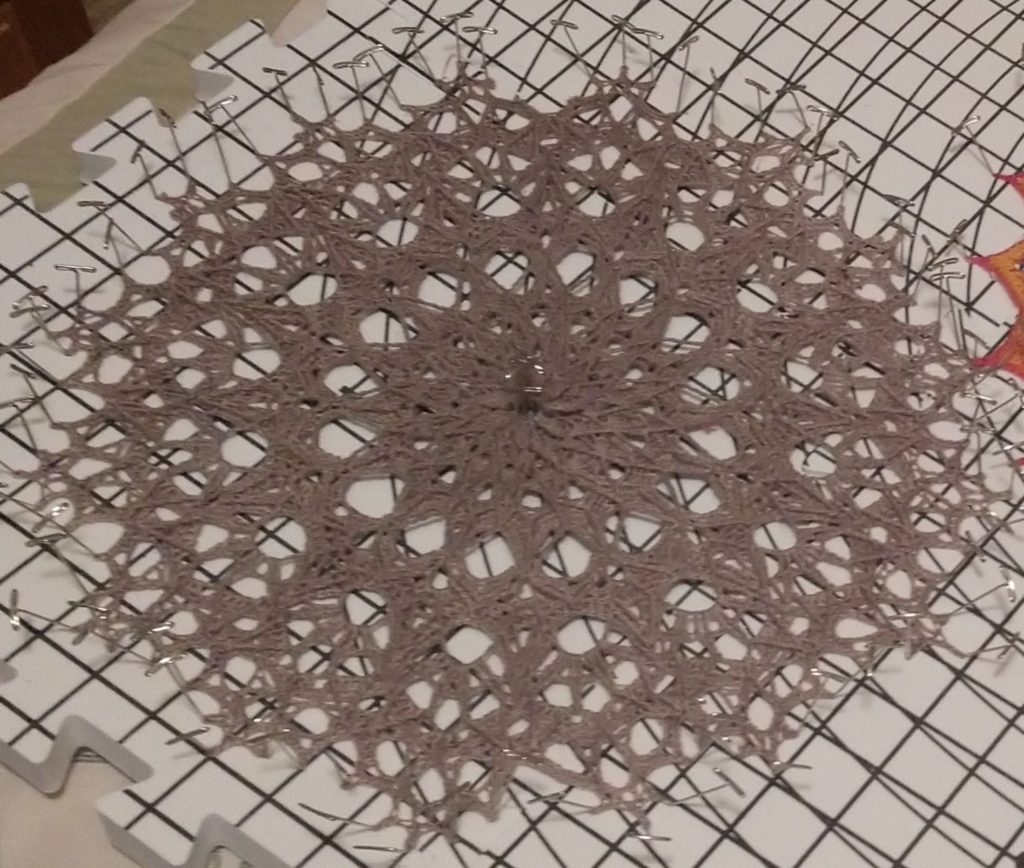
Whitney while being blocked

I start in the middle of a round doily and secure it with several pins. If I used just one, it might leave a mark. Even two is not enough. So I use at least 4 and try to make it look as circular as possible.

My next step is to start at approximately 12:00 and secure the outermost picot. I don’t worry about the littler ones yet. I then travel across to 6:00 and secure the corresponding picot. I repeat the steps for 3:00 and 9:00. I now step back and make sure that everything looks symmetrical. Did I actually get the right picots? Are there the same (or approximately the same) number of picots between each pin?

The next steps are pretty much the same. This was a 16 pointed circle, easily divided by 4, so I had 3 picots between each point. I would go halfway between each “quarter hour” and pin one picot, then do the corresponding picot on the opposite side. And, keep repeating that process until all the outermost pins are in place.

Next comes the tricky part. Each of these points is composed of 3 picots. If I stopped here, my points would show up, but they wouldn’t be anywhere near as lovely as the one I showed you. So you have to meticulously go around the edges and find every single little picot and spread them evenly. It can take a whole lot of pins to do this. But, why go to the trouble of making a beautiful doily if you’re not going to let it shine?

Once it’s all blocked out, it will look like this.

Some people use pins in the center, but I find I don’t have to. I stretch my work within an inch of its life and the stitches open up nicely. The more pins you use, the more likely you are to put a wonky line somewhere you don’t want. So I let it do its thing and hope for the best. You can always reblock if you need to!

So, that’s the basics of blocking doilies. They really are simple to block just a little tedious. Squares are the easiest and can be stacked to block multiple squares at a time. I make a lot of shawls, which are really long on one side and shorter on the other. They can be difficult to keep the angles symmetrical and keep the tension evenly spaced on the long side. I’ll go over my techniques for that in another post.

Happy hooking everyone!

I recently learned a new technique for starting stitches and it’s made a HUGE improvement to that irritating little gap at the beginning of rows. It’s called Stacked Double (or Treble or Quadruple…) Crochet.

I’ve tried a multitude of methods but found most of them lacking. Starting with just a chain leaves a gap that I don’t like. Chainless starting double crochets don’t always look right with all yarns . I’ve slip stitched into the first stitch and then done a chain, hoping to move the stitch over and close the gap. I’ve done a modified chainless starting double crochet, where you actually pull the first loop up through the first stitch and then twist and treat like a double crochet. But, they all have their flaws and don’t match well.

Until now. I started doing a stacked double crochet and that seems the best solution! It’s a tiny bit thicker than a regular crochet, but once it’s in a finished project, it’s virtually undetectable. It’s coming in especially handy with my current project.

To start, place single crochet in the first stitch, no chain or anything. Nothing hard yet! Then, here’s the really novel part, you slip your hook in between the two vertical parts of the loop in front of you push your hook out the side of the loops, yarn over, and pull that loop back through. You should now have two loops on your hook. Yarn over and pull through two loops and you’re done! This is a single crochet, with another single crochet stacked right on top of it, thus the name “stacked” double crochet. You can repeat this process as many times as you need to achieve the height you want. A stacked treble crochet has three singles stacked on top of each other, and a stacked quadruple has four. Great stuff right?

I’m at the beach celebrating my 50th birthday this week and I neglected to bring anything to film this stitch with. When I get home, I’ll post a video and include it in this post. It’s a great way to start a project with no gaps!

You may not have ever thought of this, but it’s something worth paying attention to. What do you do at the end of a row when it comes time to turn your work?

The crochet world has a few inconsistencies, and this is one of them. It’s rarely even mentioned in patterns, and it can make a huge difference in your edges! I’m not talking about whether you chain first and then turn, or turn and then chain.

I’m talking about the specific direction you actually turn your work over. If you’re right handed, and you’re working in rows (not rounds as in a circle), when you come to the end of a row, you’re on the left corner.

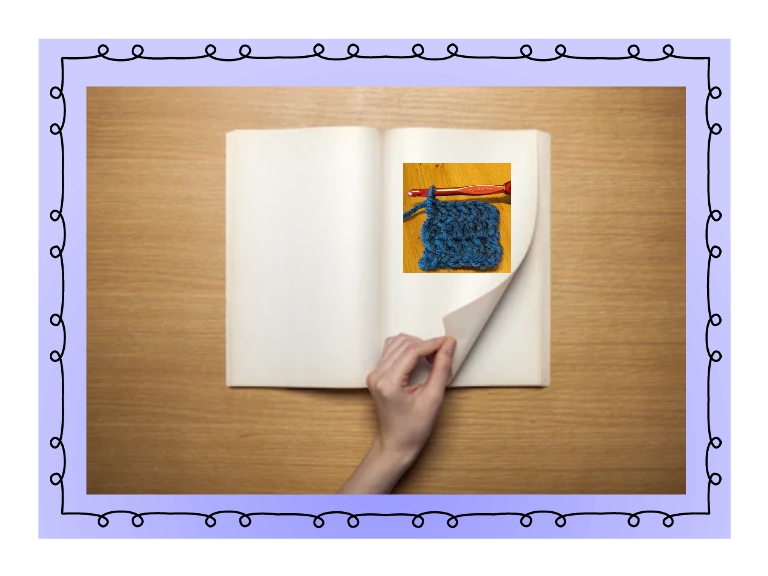
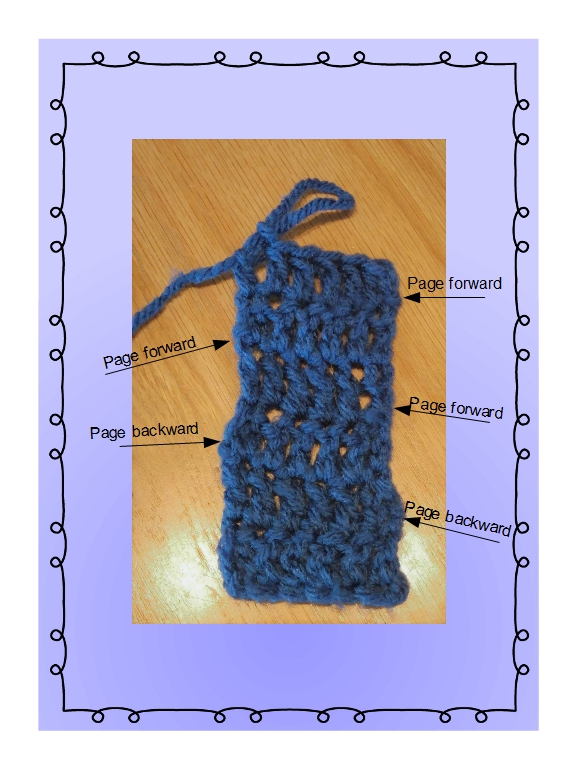
If you imagine your work as though you were holding a book, you can visualize it like this. You can turn the lower right corner of your “page”, keeping your working yarn and stitch stable, like the spine of the book. When you do this, your working yarn wraps behind your work and keeps the yarn in the back where you typically are carrying it in your work. It also puts a little bit of tension on the outside of the stitch, which can help keep your edges flush and tight.

The other way is kind of flipping back a page in a book. You’re turning your work and bringing your working yarn to the front of your work. This also places some tension on the outside stitch, but might result it a bit of a bump. But, bumps can always be covered by a border, so you really have to figure out what feels more natural to you and what result you like.

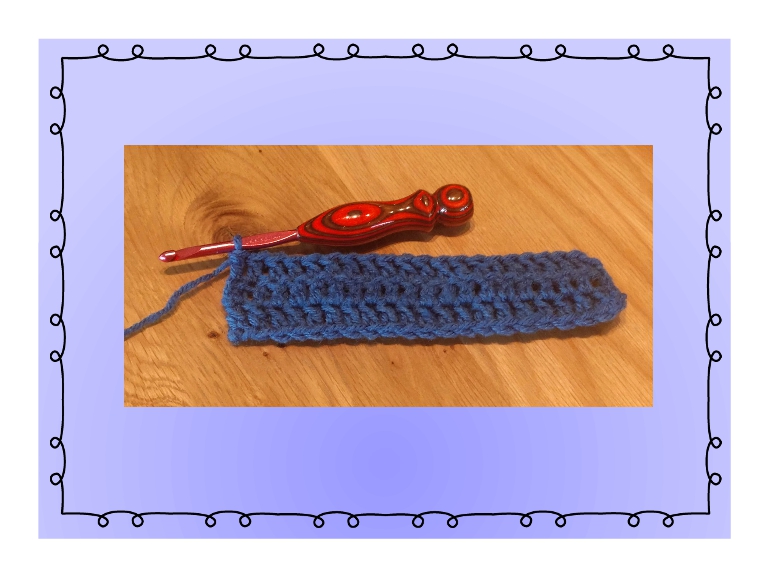
I personally prefer the first way. But I used to always do the second way until I checked for the differences. This picture shows how different my edge stitches look using both methods. It took some time and conscious remembering to change that habit, but I’m much happier with the results!

So, how do YOU turn your work?