Anyone who’s crocheted for any amount of time thinks that the WORST part of projects is sewing in ends. Okay it’s me. I’m anyone. And I hate sewing in ends.

I’ve experimented with a variety of methods and spoken to many crocheters about it and I’ve decided the absolutely MOST IMPORTANT TIP is to leave your ends long enough. Like about 12 inches. Unless you’re playing yarn chicken, and then you do what you have to do.

If your end is long enough, you have room to sew in ends right. You won’t use all this length, but you’ll use maybe half of it. If your end is too short, that last little pass through will be extremely hard and you might have to resort to some special tricks to make it work.

First, start with the best needle. I like stainless steel best. Aluminum gives me the heeby jeebies. It squeaks and sounds like fingernails on a chalkboard to me. So don’t fall for the pretty colored needles. Unless you like that sort of thing. šŸ˜‰

These are my favorite needles. Clover Bent Tip Tapestry Needles The little bent end makes it super easy to get in the tiny spaces between your stitches. And since they’re stainless steel, they’re also magnetic, so they stick to the magnets on my work easel. Major bonus points on that one.

Next, once you have your yarn threaded, you weave your ends into the bottom of your stitches for at least 10 stitches, making sure you poke in between the plies on your last stitch. Next, turn around and go back through the same stitiches, but be certain you don’t go back through that first yarn split. Again, with the last stitch, you want to go between the plies on the final stitch. You may do this a third time depending on the project. I usually do, because I want that extra length available in case something goes wrong after the project is done, but it should be secure enough with just two passes if you have a delicate project and you don’t want the bulk to show through.

That’s it! Snip the yarn as close to the end as you can, and I normally rough up the edges just a bit to hopefully tangle them together and add a measure of security. This is particularly effective with wool and other knotty yarns.

Happy Hooking!

There are many ways to join your yarn. I’ve tried a lot of them, but my preferred method is the Magic Knot. And once you know how to do it, you’ll see – it really is a little bit of magic!

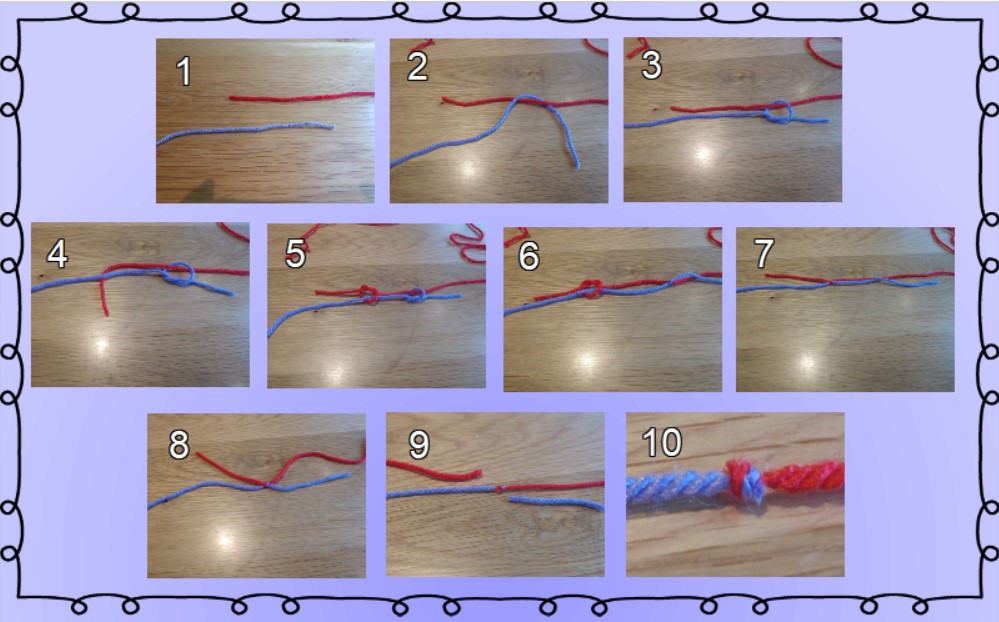
Here are the overall steps to check out. Detailed instructions are below.

The amazing Magic Knot!

I like to use this anywhere I need to start a new strand of yarn. It works best with yarns and threads that are not slippery – acrylic, cotton, wools, anything that has a little bit of grab to it. A slinky, slipper yarn will come undone, however. So be sure to test your knot and yank on it HARD before moving on.

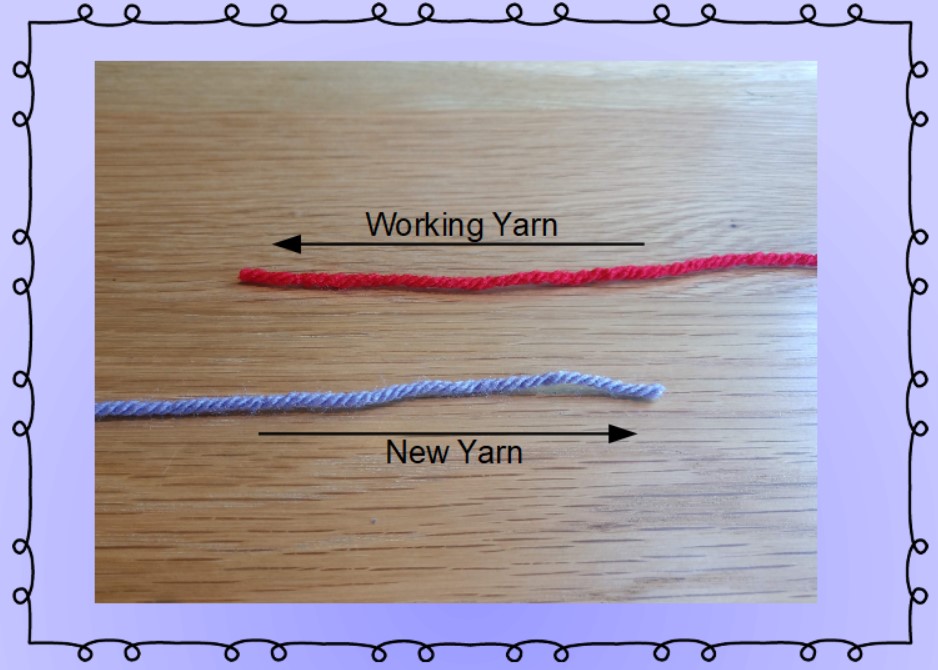
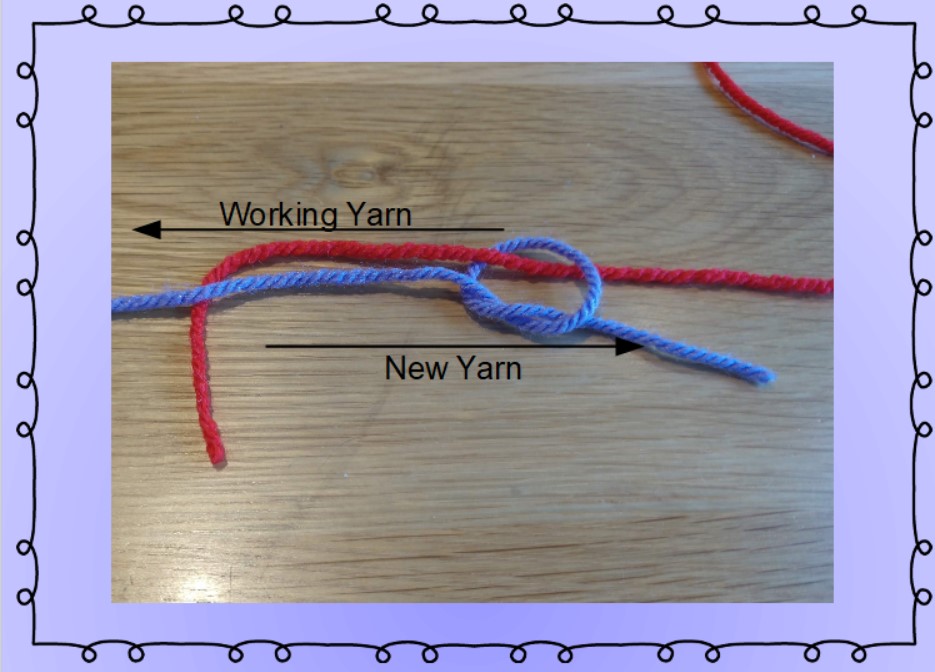
Step 1: Take your working yarn and lay it out with the end facing away from your work. Your new yarn will face the opposite of that direction. This might be different if you’re left handed, so switch them appropriately.

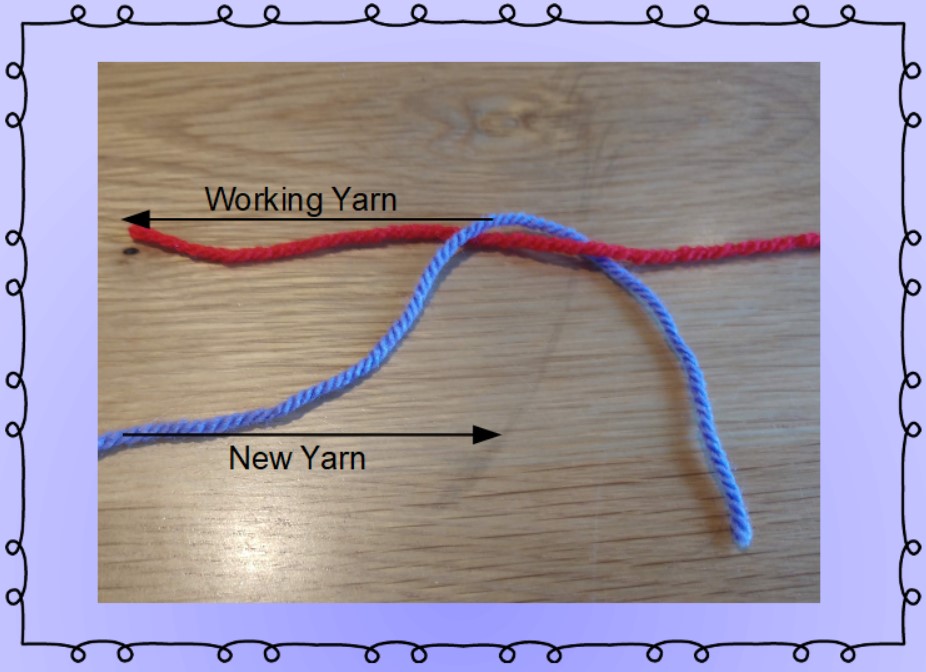
Step 2: You’re going to start making a regular knot, which is called an overhand knot, with your new yarn. You’re going to cross it OVER your working yarn and bring it back towards you under the working yarn.

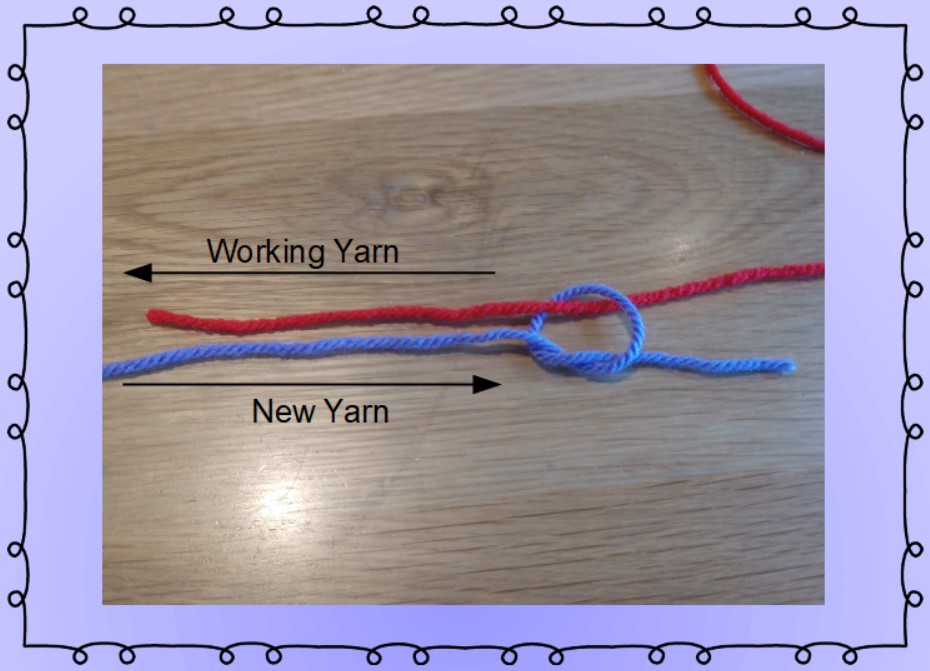
Step 3: Make a loop AROUND your working yarn and pull the new yarn tail through, making sure that your tail continues in the same direction it started. (You can pull that knot tight at this point but I left it loose for this pictorial.)

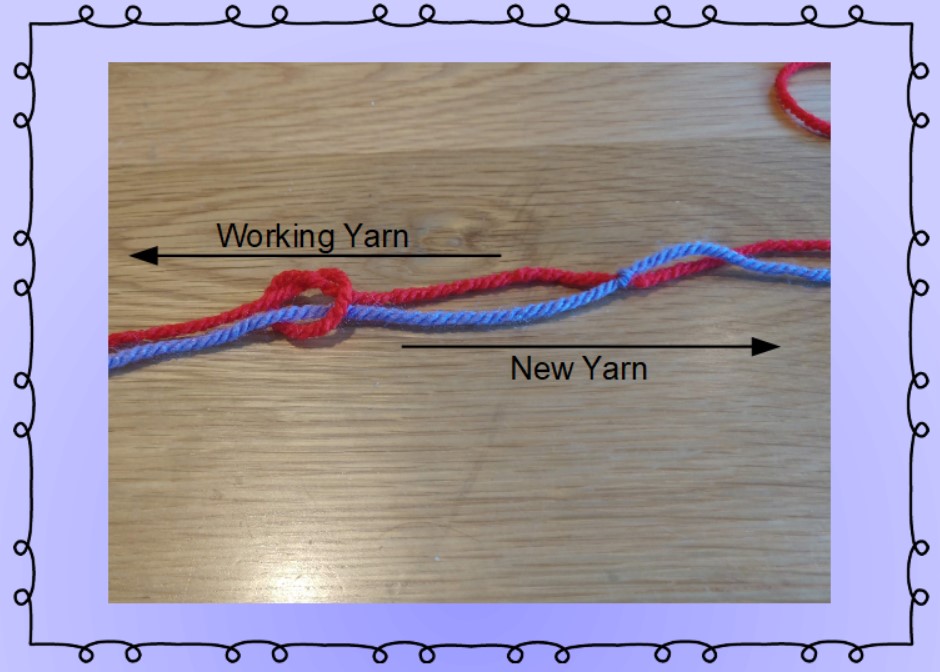
Step 4: Start your second knot with your working yarn. You will cross this strand UNDER the new yarn.

Step 5: Close your working yarn knot AROUND the new yarn by bring your tail over the new yarn and through the loop you just made, making sure that the tail is facing the same way it started, opposite of the new yarn.

Step 6: Tighten your first knot if you haven’t already done so. And I mean REALLY tighten it. You want this nice and snug and I’ll tell you why in just a minute.

Step 7: Tighten the other knot if you haven’t already done so. Same goes with this knot. Tighten it HARD!

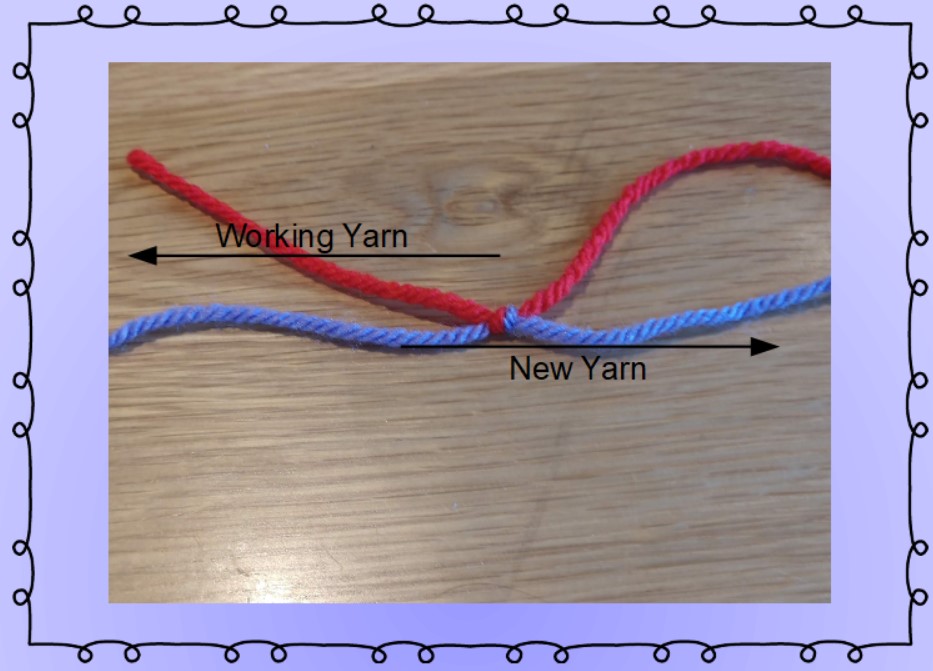
Step 8: Grab the tail of the new yarn in one hand, and the tail of your working yarn in the other and pull them towards each other. If you tied your knots correctly, this should be fairly easy to do. Once they’re touching, give them a really hard yank.

Now, here’s where the magic comes in. As long as you followed these directions precisely, your knots are facing in opposite directions. The harder they push against each other, the tighter they become. This doesn’t hold true on yarn that is slippery, which is why I recommend you always test it before moving on. But, I have been using this knot for years with great success! It makes a very small little bump in my yarn, but once the project is worked up, it’s barely noticeable! So, let’s finish this tutorial.

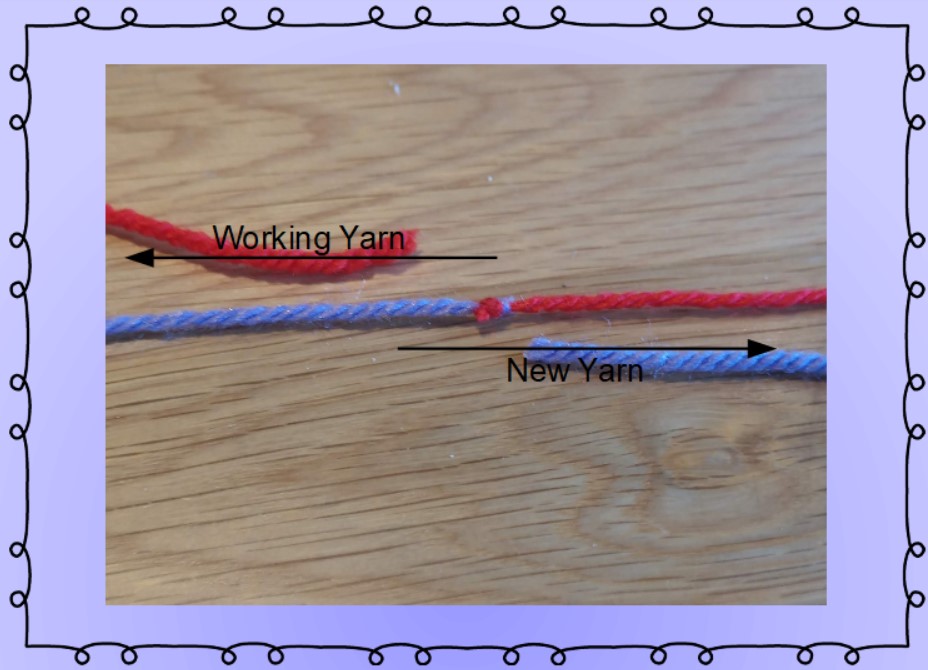
Step 9: Cut the tails. Don’t be afraid to cut them right up against the knot. As long as you don’t actually cut the knot, it will be secure. I promise!

Step 10: You’re done! Look at that beautiful knot! It’s secure, and barely noticeable.

Give it a try and let me know what you think!

Iā€™m currently nearing the end of my first official cable blanket and I have a feeling there will be many more of these in my future. I adore the geometry and complexity of the pattern and watching my concept come to life in yarn.

Iā€™ve always enjoyed making cables. Both the variety of the stitch pattern and the magic illusion of the twisting vines of yarn keep my on my toes. I have previously designed a cable scarf that was very simple and another scarf with some cable like features, but the idea of a large scale blanket seemed years away. How do designers decide which stitch crosses where? How long should the stitch be? How do you keep everything consistent?

I figured these things out in (name of blanket here) and it was surprisingly easy.

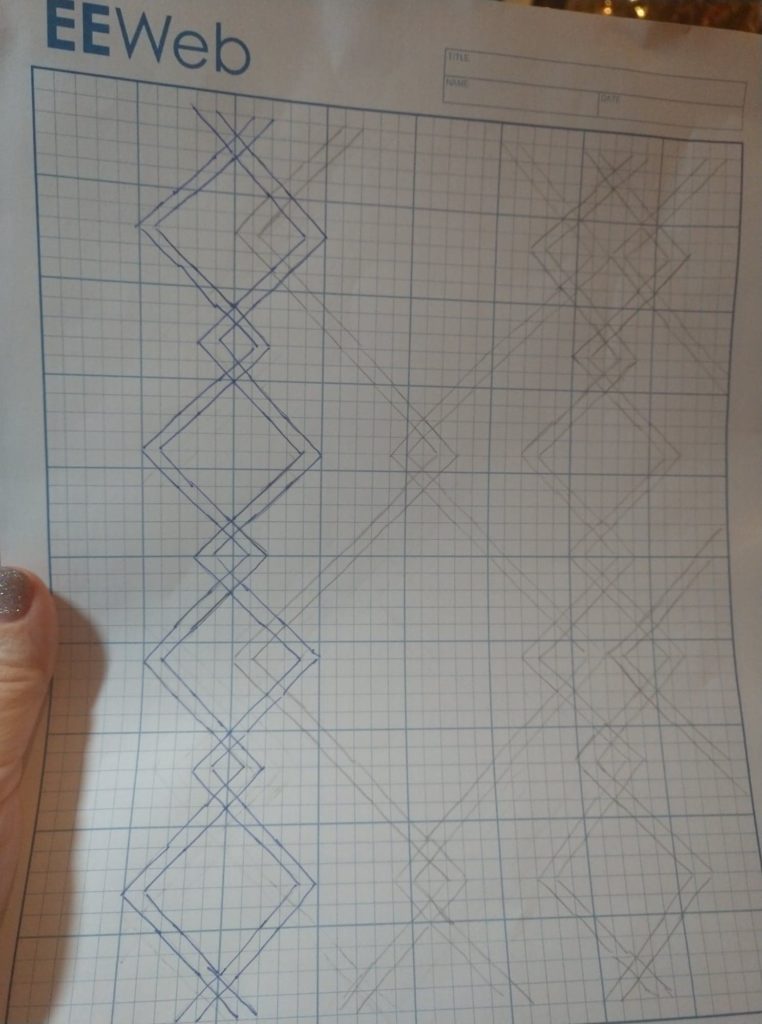
I started with some graph paper and sketched out the pattern I wanted to see. Iā€™m not skilled at drawing, so it had to be simple ā€“ connect the intersections was as much as I can muster.

My first draft. I started with pencil and as I ā€œlocked inā€ a shape, I traced over it with pen.

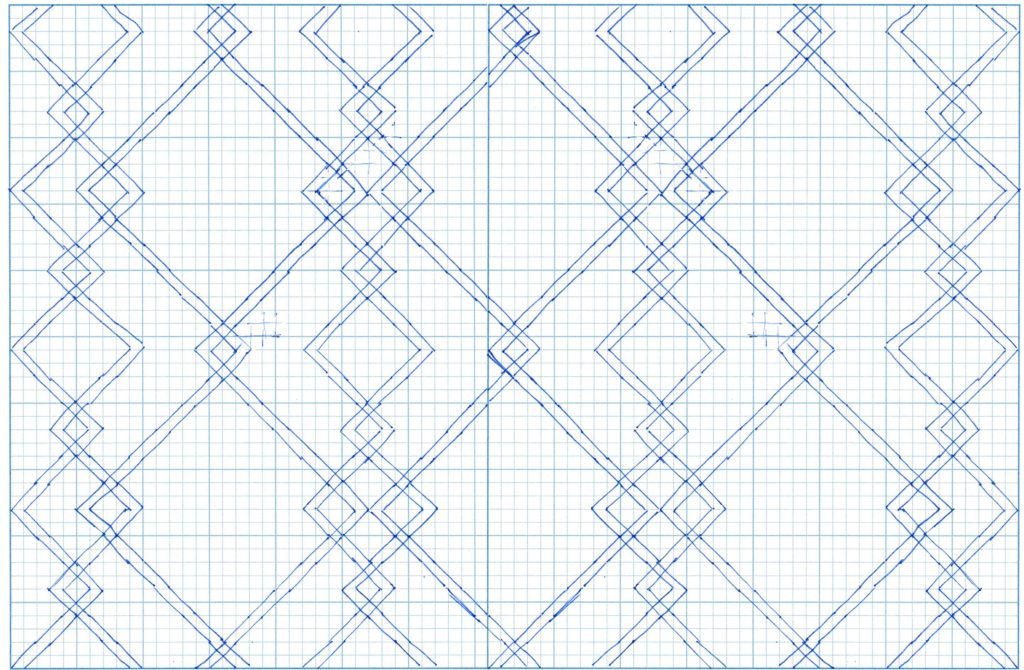
Once I was satisfied with the way things fit together, I scanned it and did some magic with photoshop and pieced together a full repeat with both beginning and ending sides and a couple of repeats in the middle.

My photoshopped mock up.

Great. Now what??? I have a bunch of lines on paper. How does that become a pattern? Which ones go on top and which go on the bottom? I still had more work to do.

This is where I got creative.

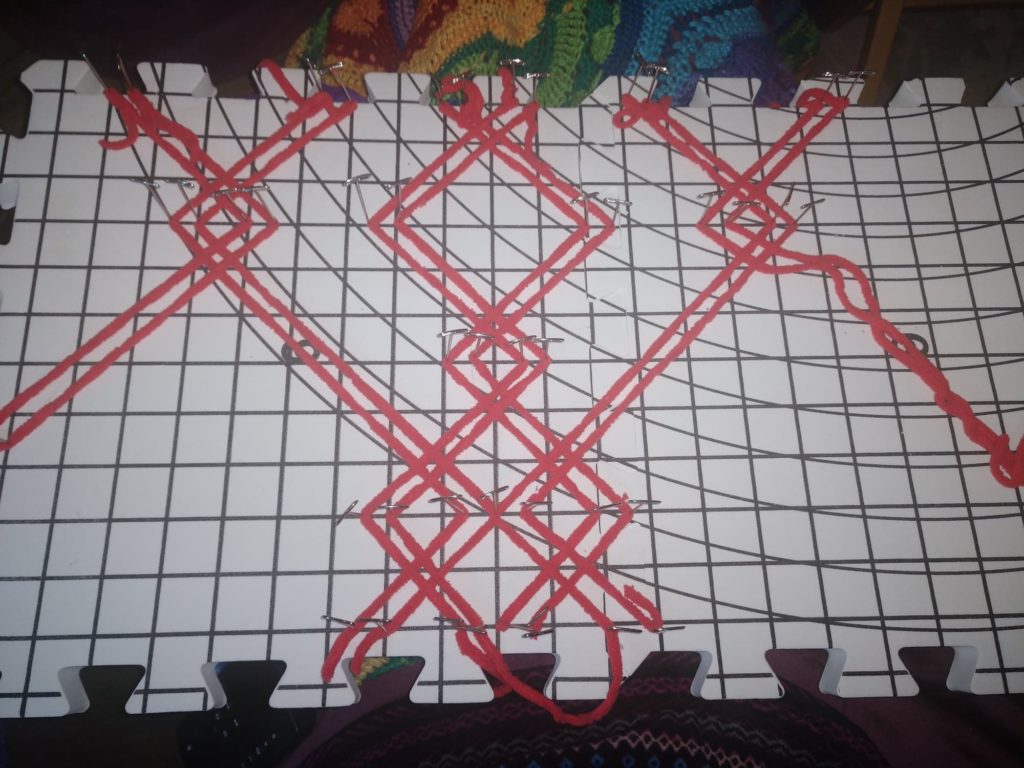
My blocking board with sturdy yarn pinned in place according to the pattern.

Okay, NOW I had something I can work with. I can play with the red yarn and place it over and under to make sure that everything continues in the right fashion. If one pair goes under in one section, it must go over in the next. So, I just pinned and repinned until it all worked out.

Now, I know thereā€™s more to the math of this. I have to delve deeper into cables to understand this better, but I feel like I have a good handle on where to go from here.

I hope you enjoy the results! And, if you made it through all of this, kudos to you! Thanks for reading!

Work in progress, cable blanket made with Red Heart Hygge, Sterling

~Caroline